Installation and Care
Learn how to install, clean and care for 3M Privacy and Protection Products.
3M™ COMPLY™ Magnetic Attach for Monitors
-
- [Instructor] Today we'll show you how to apply 3M brand Privacy Filters with the 3M brand COMPLY brand Magnetic Attach for Monitors. This Comply Attach System is specially designed for flat-front glass displays, and allows you to quickly and easily switch from world-class privacy to screen sharing thanks to ultra strong magnets that click securely into place. Let's get started. Make sure you have a clean, flat surface to work on. Your package contains a privacy filter, two quick-click brackets, and two monitor bars. Depending on your style of privacy filter, it might have two different sides such as glossy and matte black. So line up the filter to your screen and determine which side you want visible to you. We'll attach the quick-click brackets to that side. Let's start with the monitor bars. Peel off the blue liner, avoid touching the adhesive, and adhere the monitor bar on the top of the monitor body. About one inch from the outside edge, and as close to the front edge of the monitor as possible. The closer the monitor bars are to the front edge, the more secure the attachment will be. Repeat with the other monitor bar. Next, let's attach the quick-click brackets. Each bracket has a domed top, and a clear plastic tab. The top houses ultra strong rare earth magnets that will attach the filter flush against your screen by attaching it to the monitor bars you just placed on top of your monitor. The clear plastic tabs will attach to your privacy filter and hold it against your screen. To attach the quick-click brackets for the best fit, we will line up your privacy filter over the active display of your monitor, then put the quick-click bracket into place letting the magnet do the work. First, peel the liner off the brackets and avoid touching the adhesive. Line up your filter over the active display of the screen and hold it in place with one hand. Then, snap the bracket in place pressing the adhesive to the filter. If your monitor has a chin or ledge below the active display, you can use this to help properly align the privacy filter. To firmly attach your quick-click bracket to the privacy filter, and remove any air bubbles, pinch and squeeze the filter to the adhesive on the quick-click bracket, pushing the bubbles out to the edge. Repeat with the second quick-click bracket on the other side. Your filter should cover your active display and rest flush up against it while the brackets magnetically hold it in place. To unclick the magnetic attach and remove your privacy filter, you can grab the quick-click brackets keeping your privacy filter free of fingerprints.
Watch this video for quick and clear instructions on how to install your 3M™ COMPLY™ Magnetic Attach for Monitors.
Monitor Attachment Options
Some attachment parts are not included with all filters.
Installation instructions
3M™ COMPLY™ Magnetic Attach for Monitors
The 3M™ COMPLY™ Magnetic Attach for Monitors allows you to quickly and easily switch from world-class privacy to screen sharing.
Installation Video
Watch this video for quick and clear instructions on how to install your COMPLY magnetic attach for monitors.

How to apply
WARNING:
*To reduce the risks associated with magnets and implanted medical device interference which, if not avoided, could result in serious injury or death: magnetic attachment bracket contains high strength magnets. Keep away from implanted medical devices to help prevent interference, as medical devices such as implanted pacemakers and defibrillators might contain sensors that respond to magnets when in close contact. Consult your medical professional for information specific to your medical device and whether you need to maintain a safe distance of separation between your medical device and the magnetic attachment.
How to Apply
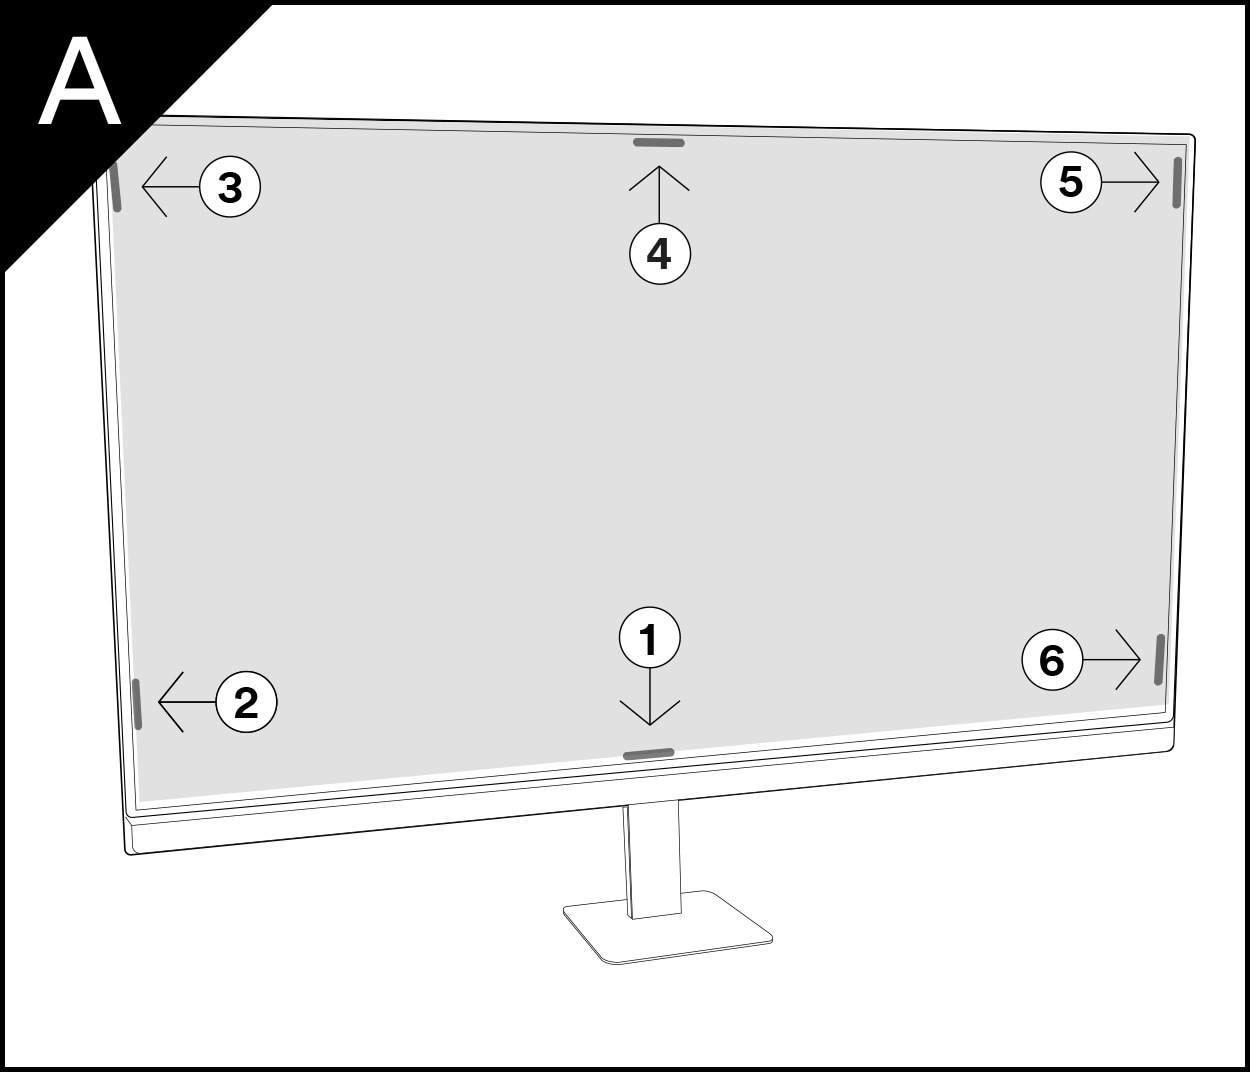
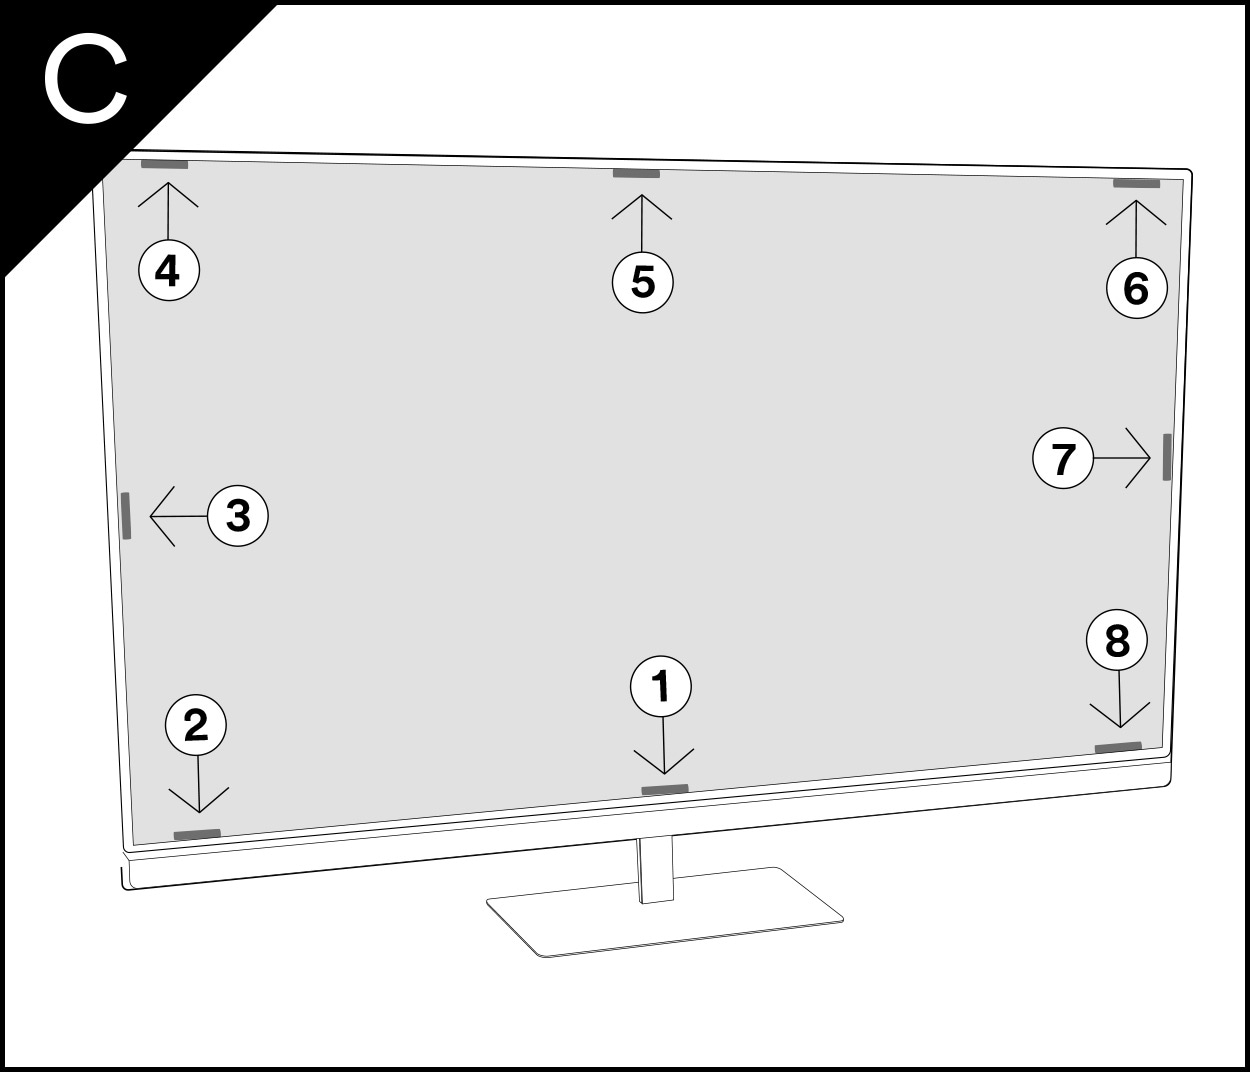
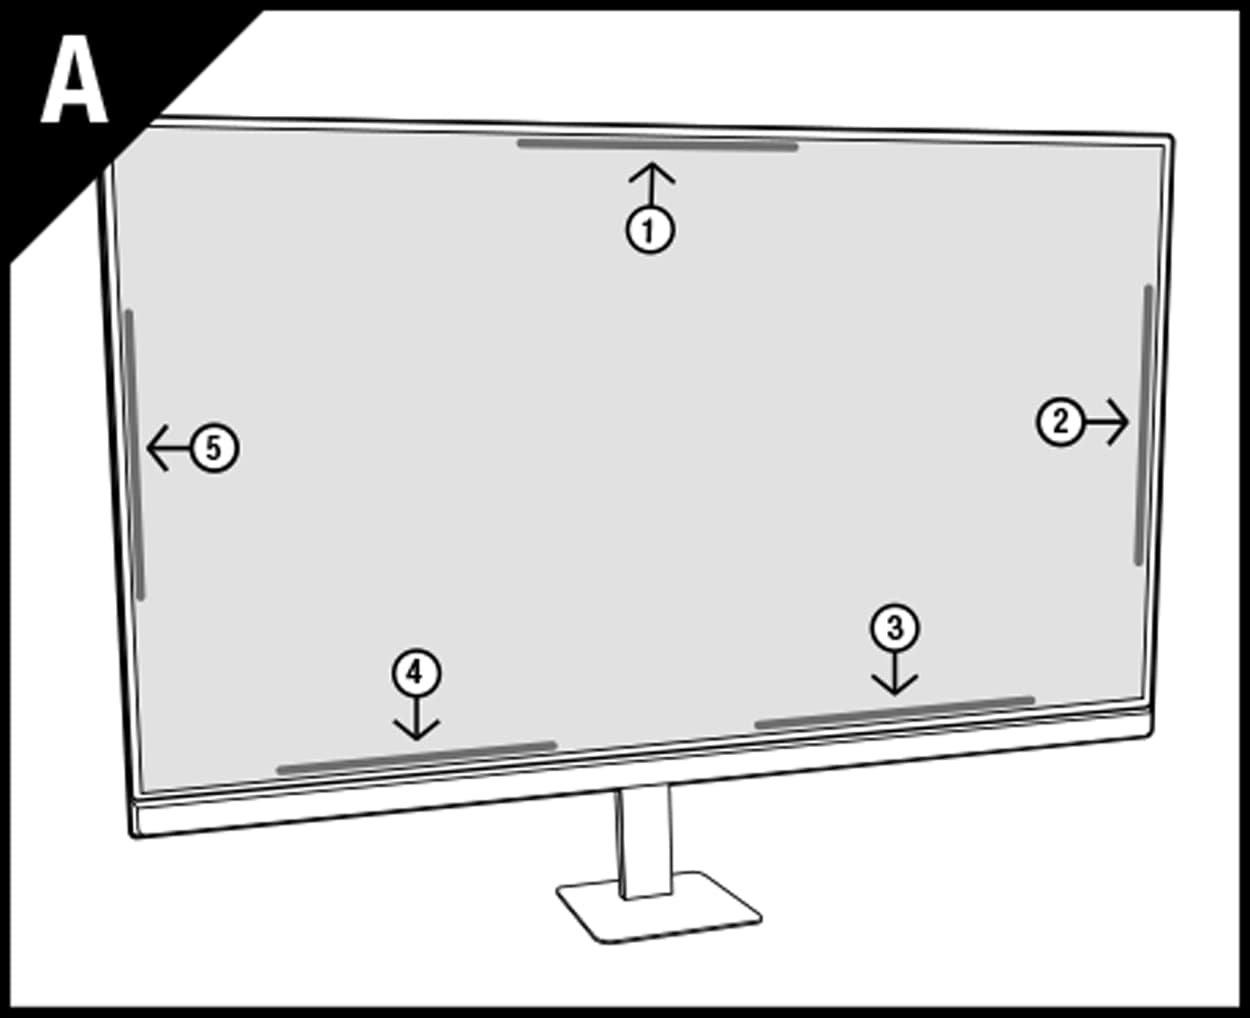
Note: Depending on the size of your display, you may not need to use all attachment strips. For larger than average displays, use additional strips provided in your package and apply as instructed.
- Peel off strip from the white backing.
- Apply strip to one edge on the back of the filter.
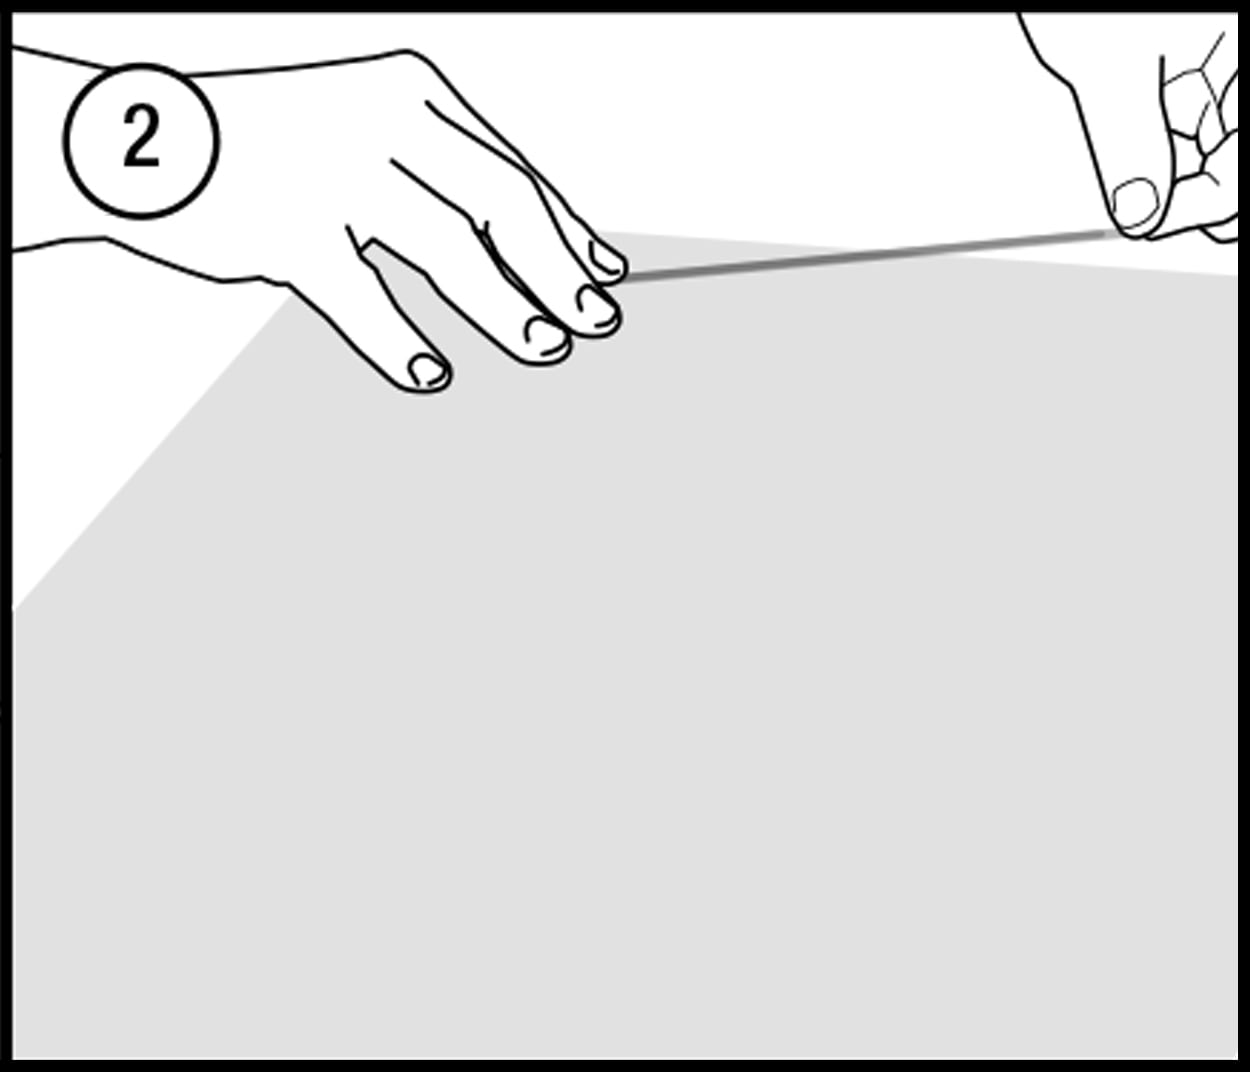
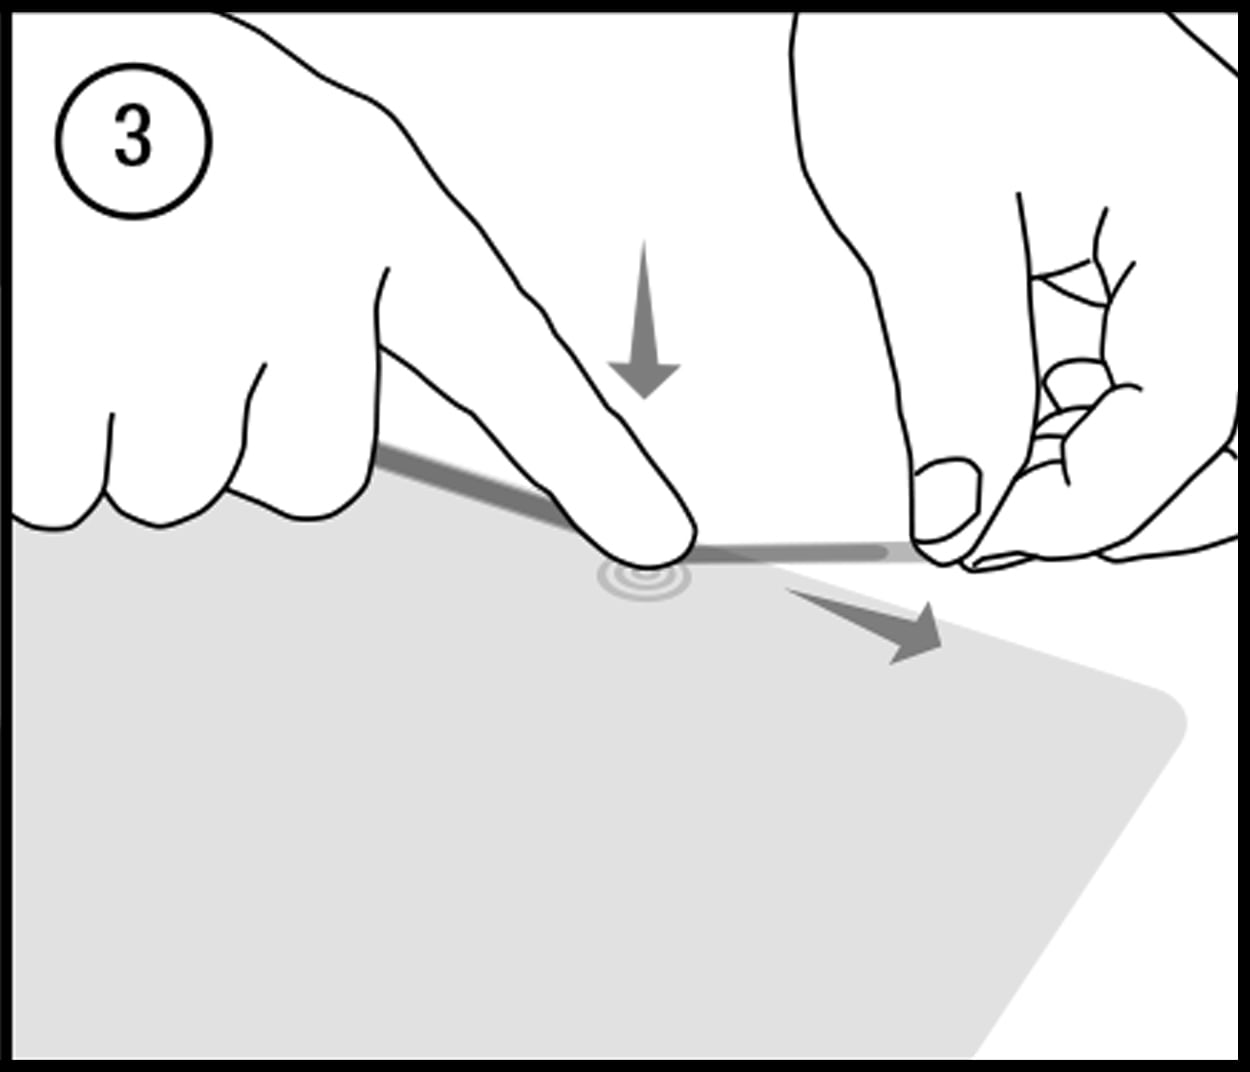
- Attach slowly and run your finger across strip to remove bubbles and adhere to filter.
- Apply all required strips before peeling off brown liners.
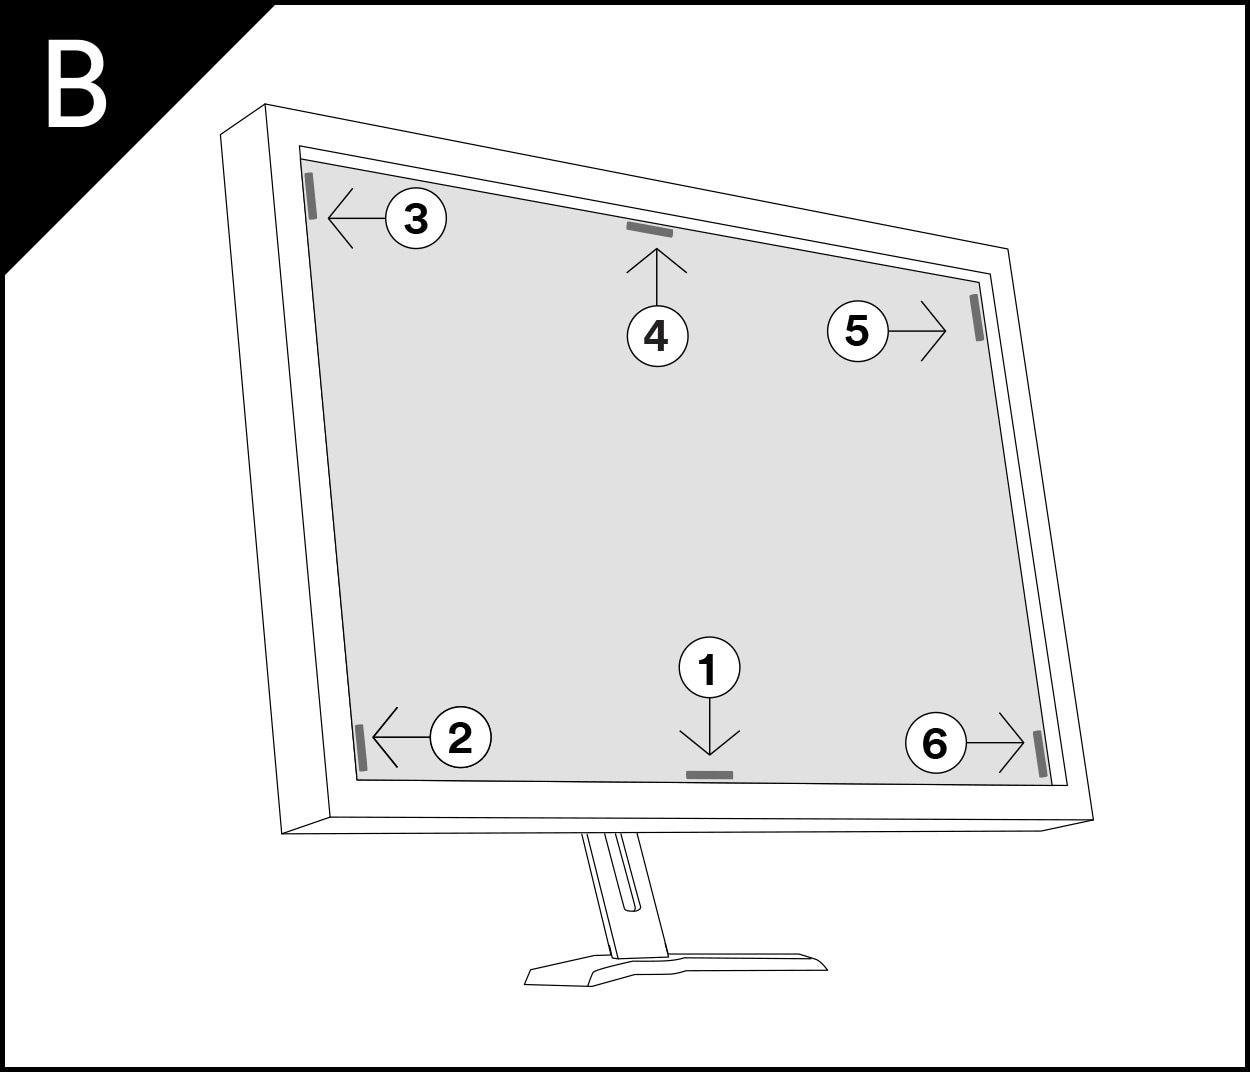
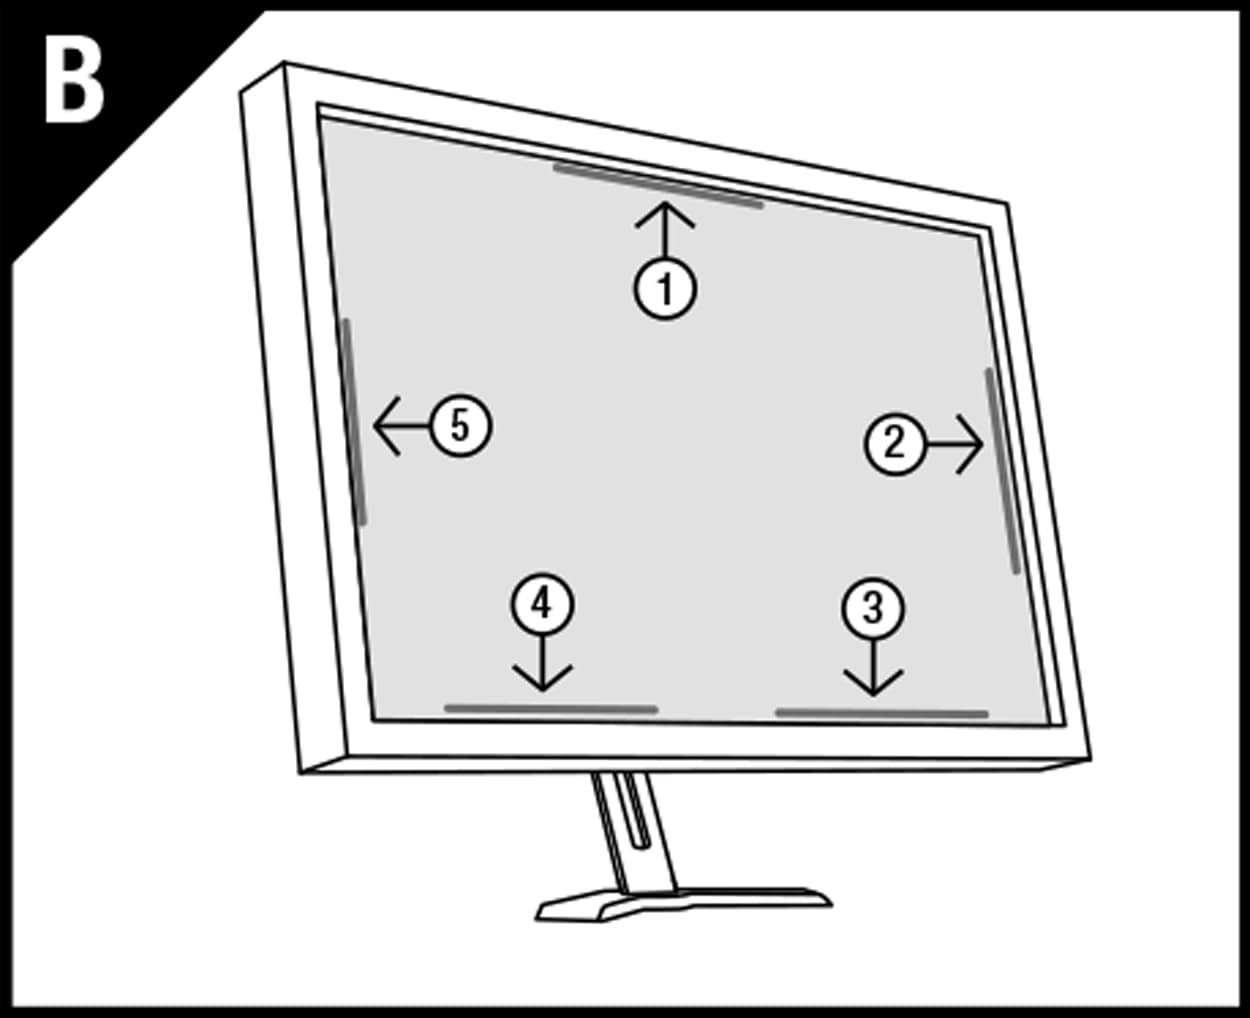
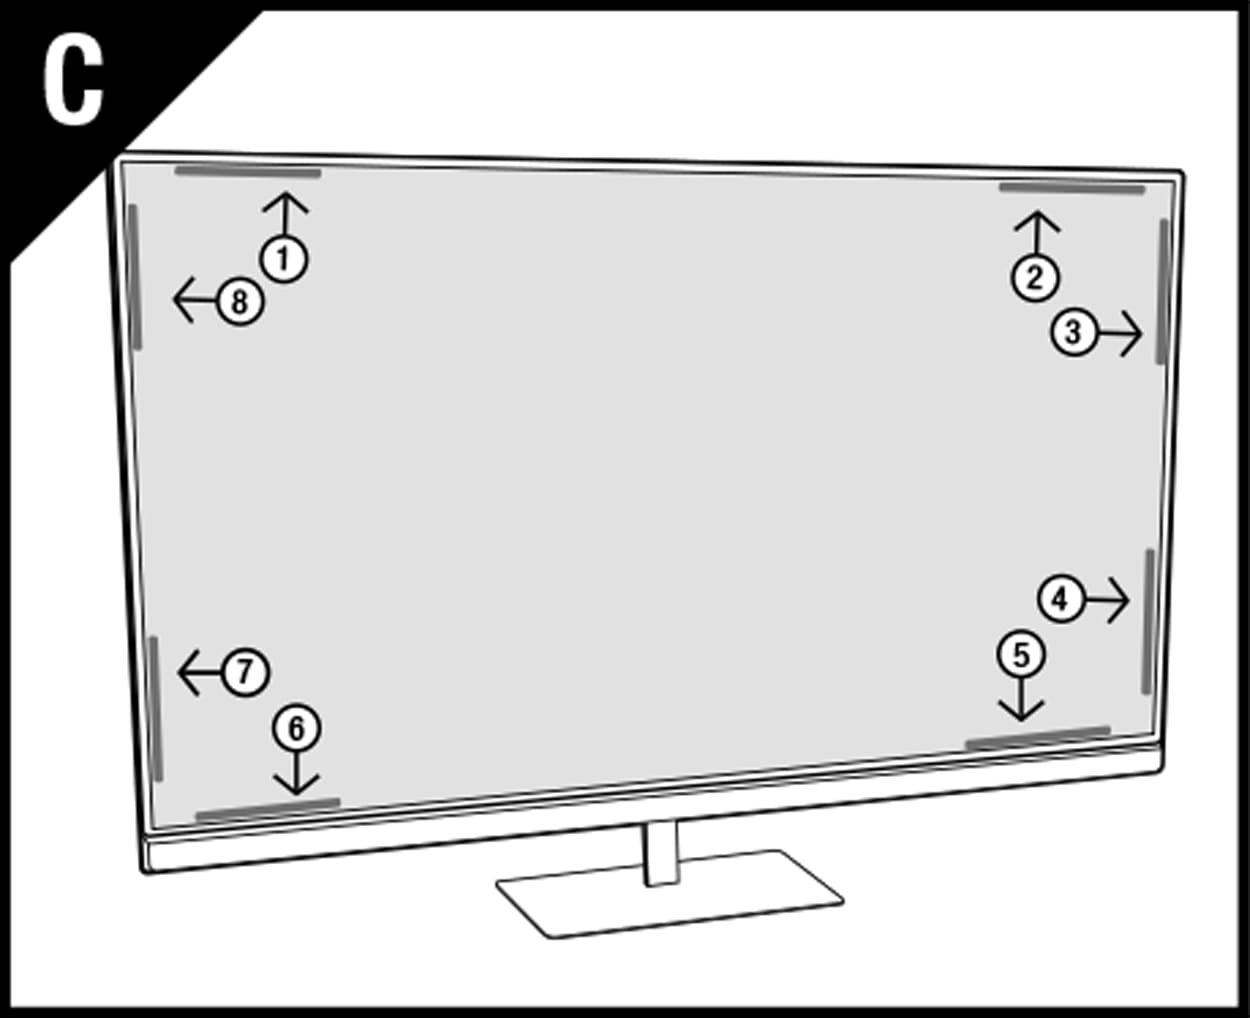
- Position the filter based on the diagram for your display type.
- Avoid touching the adhesive as you line filter up and attach to screen.
How to Remove
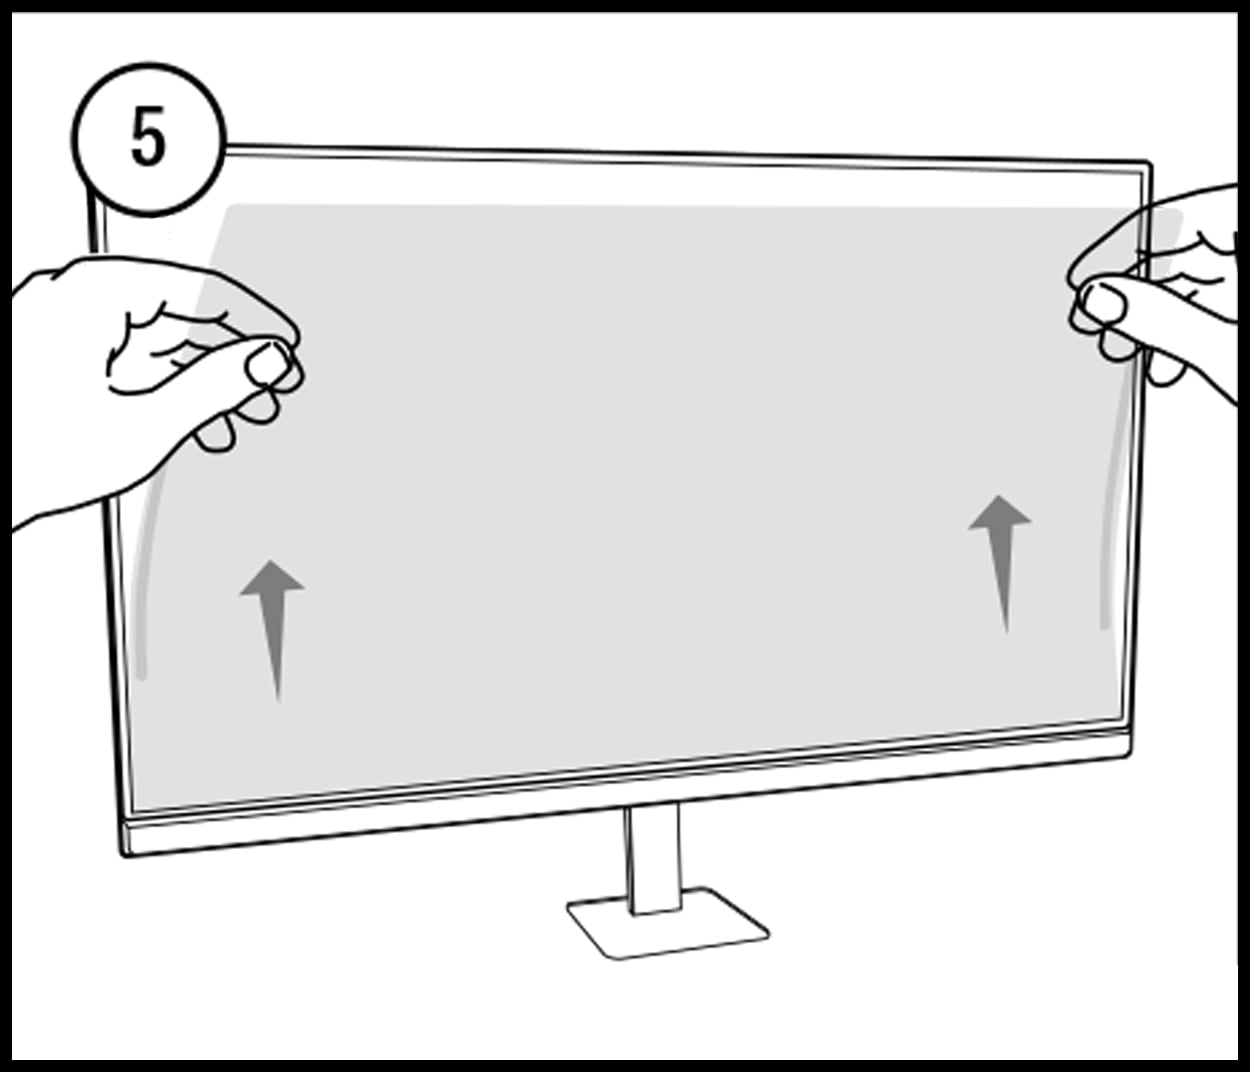
- Use the thumb notch to grab hold of the filter and slowly pull it towards you to remove from the display.
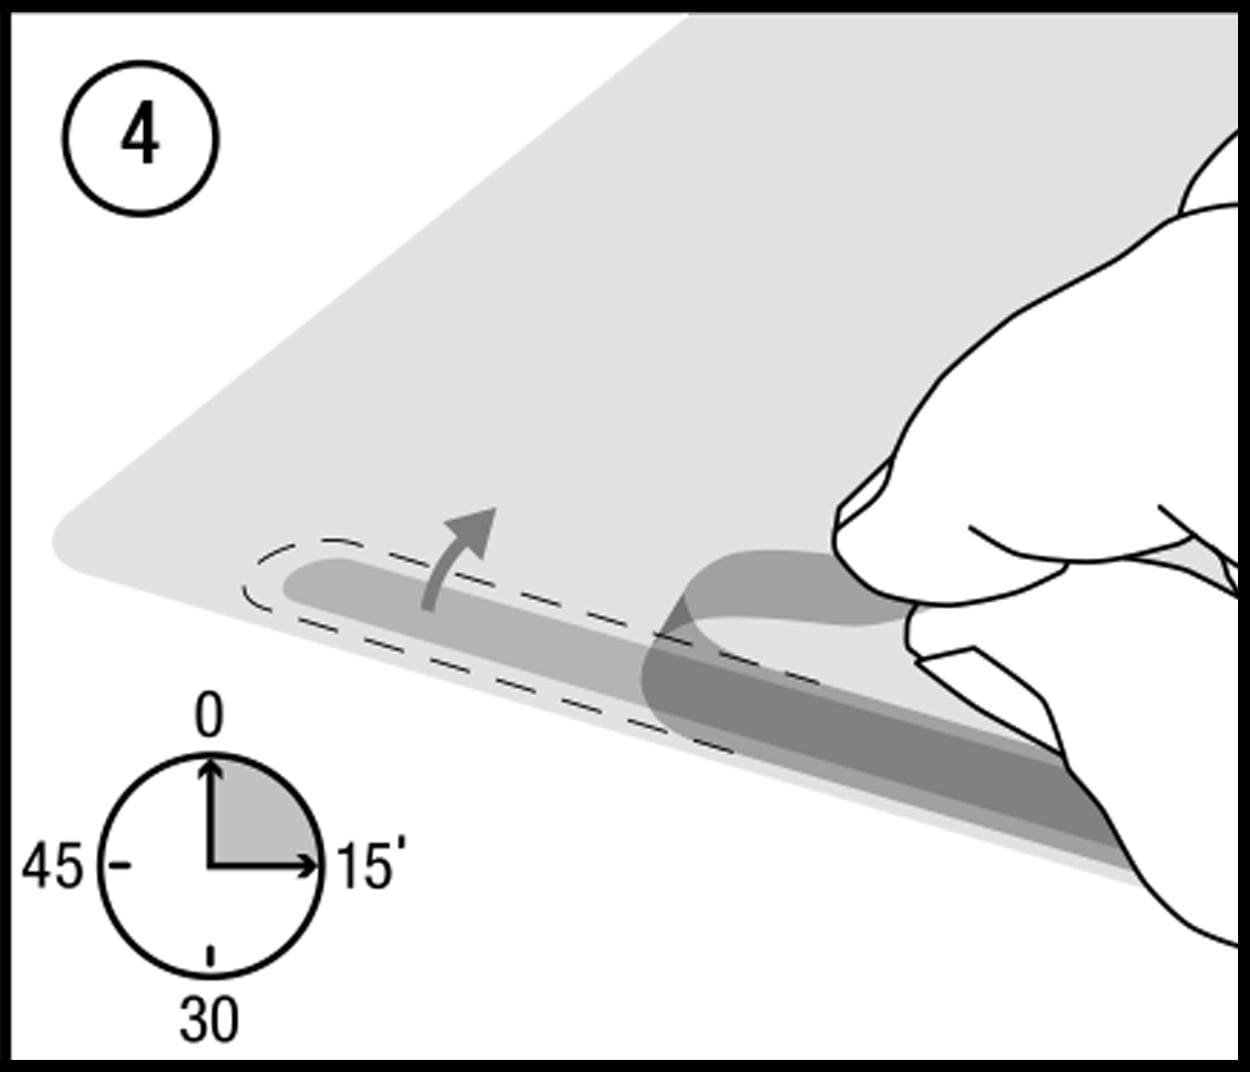
- For permanent removal or to replace attachment strips, use a fingernail to peel back the edge of a strip, then roll up the adhesive.
Tips for Optimizing Use
- Remove the filter from the device before cleaning and moisten a soft, lint-free cloth with ammonia-free glass cleaner to wipe away fingerprints, smudges and dust.
Description
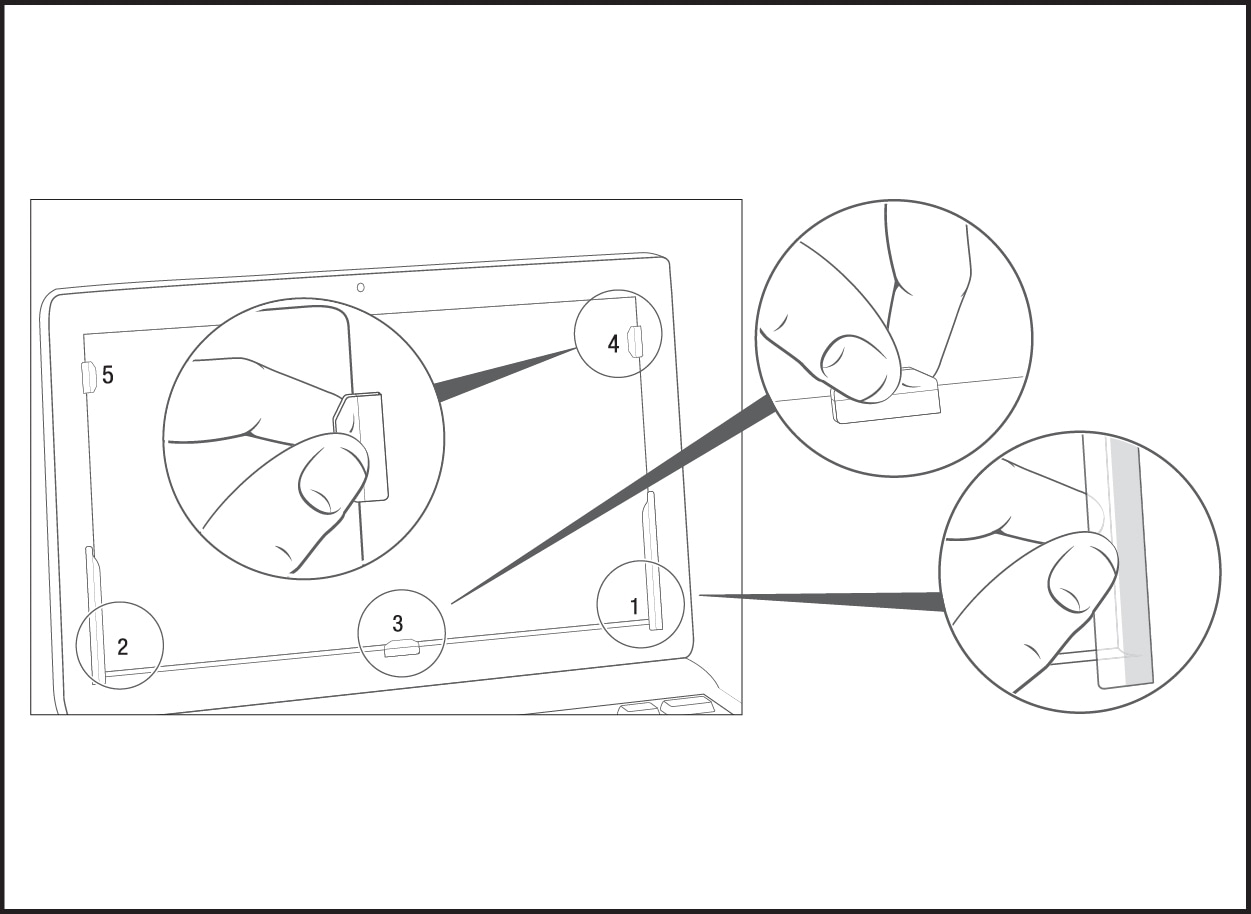
Slide mount tabs attach onto the device bezel bordering your display and stay in place, allowing you to slide the filter on and off the screen as needed.
How to Apply
Note: Depending on display size, you may not need to use all slide mount tabs provided.
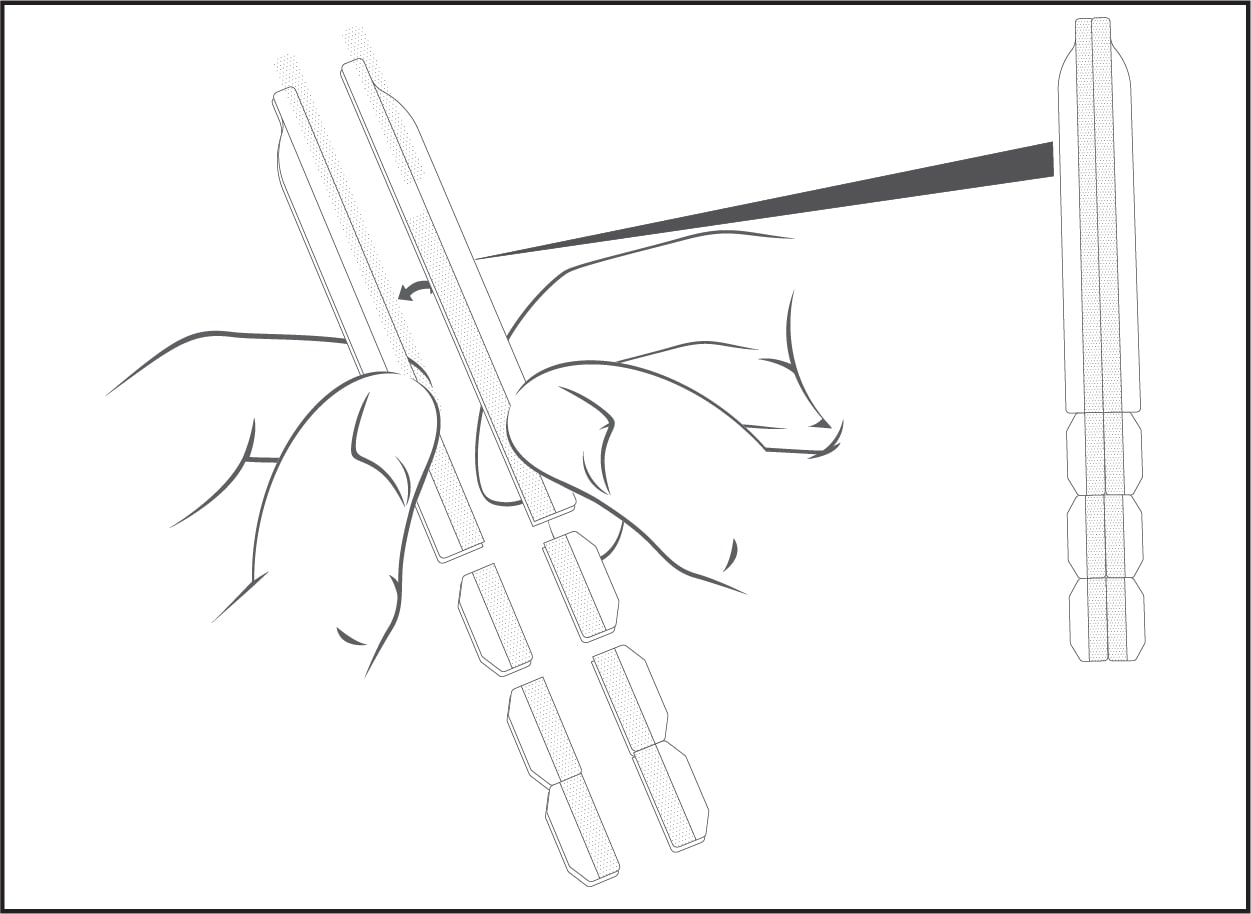
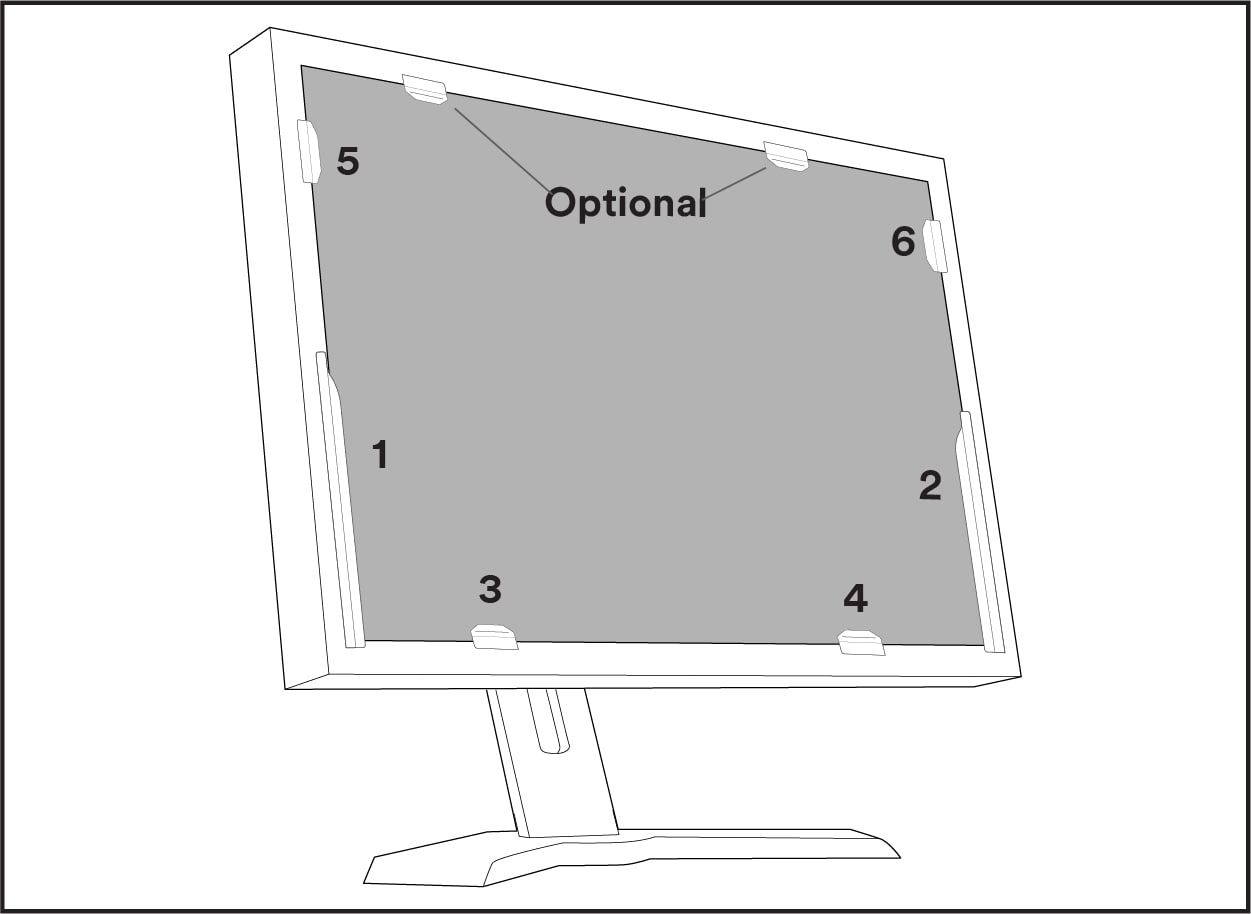
- Separate slide mount tabs by size, starting with two large tabs for the base.
- Peel off liner to reveal the adhesive.
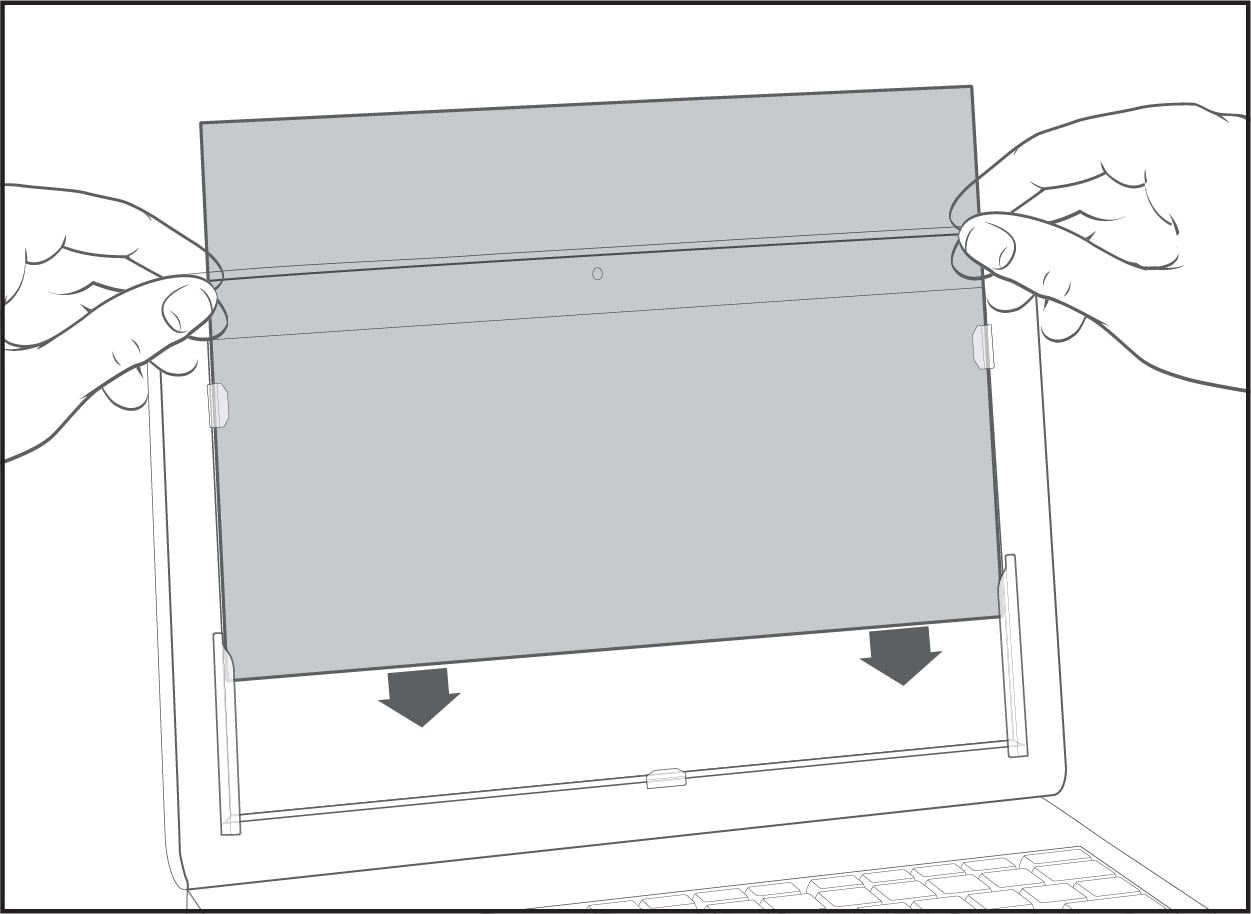
- Position large tabs on bottom corners so the adhesive attaches onto the device bezel and the tab edges hang over the screen.
- Position small tabs on the sides so the adhesive attaches onto the device bezel and the tab edges hang over the screen.
- Slide filter into place.
- Optional: Place additional tabs on the device bezel above the filter to lock it into place.
How to Remove
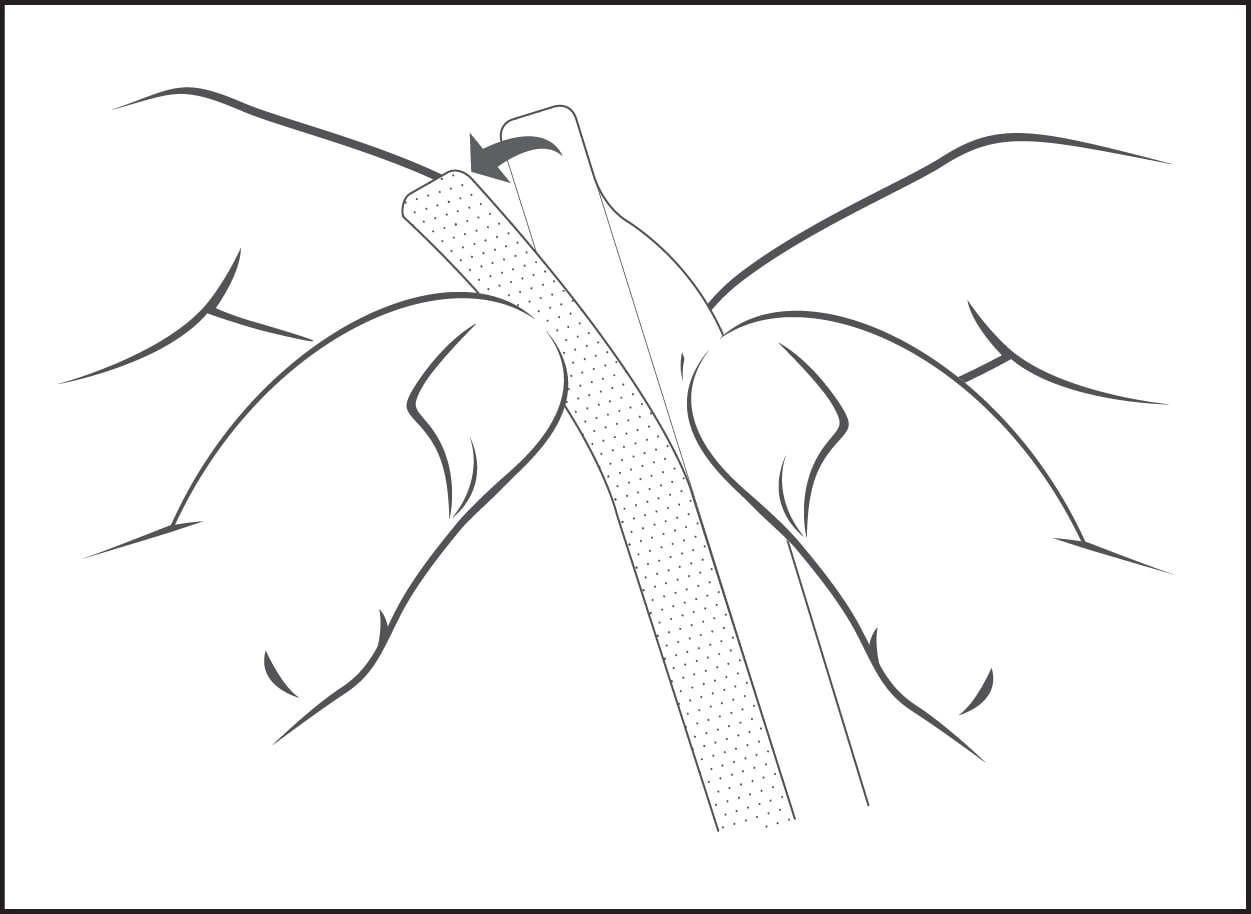
- For permanent removal or to replace slide mount tabs, grab onto the non-adhesive tab and slowly peel.
Tips for Optimizing Use
- Remove the filter from the device before cleaning and moisten a soft, lint-free cloth with ammonia-free glass cleaner to wipe away fingerprints, smudges and dust.
Laptop Attachment Options
Some attachment parts are not included with all filters.
-
 Option A
 -
 Option B
How to apply
Note: Depending on the size of your display, you may not need to use all attachment strips. For larger than average displays, use additional strips provided in your package and apply as instructed.
1. Peel off strip from the white backing.
2. Apply strip to one edge on the back of the filter.
3. Attach slowly and run your finger across strip to remove bubbles and adhere to filter.
4. Apply all required strips before peeling off brown liners.
5. Position the filter based on the diagram for your display type.
6. Avoid touching the adhesive as you line filter up and attach to screen.
How to Remove
- Use the notch cut-out to grab hold of the filter and slowly pull it towards you to remove from the display.
- For permanent removal or to replace attachment strips, use a fingernail to peel back the edge of a strip, then roll up the adhesive.
Tips for Optimizing Use
- Remove the filter from the device before cleaning and moisten a soft, lint-free cloth with ammonia-free glass cleaner to wipe away fingerprints, smudges and dust.
Installation instructions
3M™ COMPLY™ Flip Attach for Raised Bezel Fit
(for laptops with a raised bezel)
The 3M™ COMPLY™ Flip Attach for Raised Bezel Fit allows you to quickly and easily switch from world-class privacy to screen sharing with one simple flip.
Installation Video
Watch this video for quick and clear instructions on how to install your COMPLY flip attach for raised bezel fit.
How to apply
Note: Your COMPLY attachment system comes with two hinges. Each hinge has a clear adhesive end and a black adhesive end. You will attach the clear end to your privacy filter and the black end to your laptop bezel.
-
 1. Attach hinges to your privacy filter
- Remove the liner covering the clear end of the first hinge
- Apply the exposed adhesive to the top front side of the privacy filter, about an inch from the right edge. Be sure to align the black end of the hinge with the top of the filter
- Repeat to apply the second hinge to the left side
-
 2. Attach privacy filter to your laptop
- Remove the liner on the black end of the hinge
- Place the filter within the raised bezel of your laptop, with the black end over the top bezel
- Firmly press to adhere
-
 3. Apply optional flip tab
- This optional flip tab makes it easy to flip from world-class privacy to screen sharing without leaving fingerprints
- Remove the liner on the flip tab and adhere to the back side of the privacy filter on either the right or left side
How to Remove
- Like peeling tape off a box, use a fingernail to peel back the edge of a COMPLY attachment. Then use your finger to roll up the adhesive. The adhesive is designed to remove cleanly after use. In the event adhesive residue remains, this can be removed using IPA or other adhesive removers, and a cleaning cloth.
Tips for Optimizing Use
- Remove the filter from the device before cleaning and moisten a soft, lint-free cloth with ammonia-free glass cleaner to wipe away fingerprints, smudges and dust.
Tablet Attachment
Note: Depending on the size of your display, you may not need to use all attachment strips.
1. Peel off strip from the white backing.
2. Apply strip to one edge on the back of the filter.
3. Attach slowly and run your finger across strip to remove bubbles and adhere to filter.
4. Apply all required strips before peeling off brown liners.
5. Position the filter based on the diagram for your display type.
6. Avoid touching the adhesive as you line filter up and attach to screen.
How to Remove
- Use the notch cut-out to grab hold of the filter and slowly pull it towards you to remove from the display.
- For permanent removal or to replace attachment strips, use a fingernail to peel back the edge of a strip, then roll up the adhesive.
Tips for Optimizing Use
- Remove the filter from the device before cleaning and moisten a soft, lint-free cloth with ammonia-free glass cleaner to wipe away fingerprints, smudges and dust.
3M™ COMPLY™ Attachment System - Bezel Type
-
Watch this video for quick and clear instructions on how to install your 3M™ COMPLY™ Attachment System – Bezel Type.
Disclaimer
Slide mounts or Comply Flip Attach ⚠WARNING: small parts - keep out of reach of children. Please click here (PDF, 135 KB) for all global warnings.


